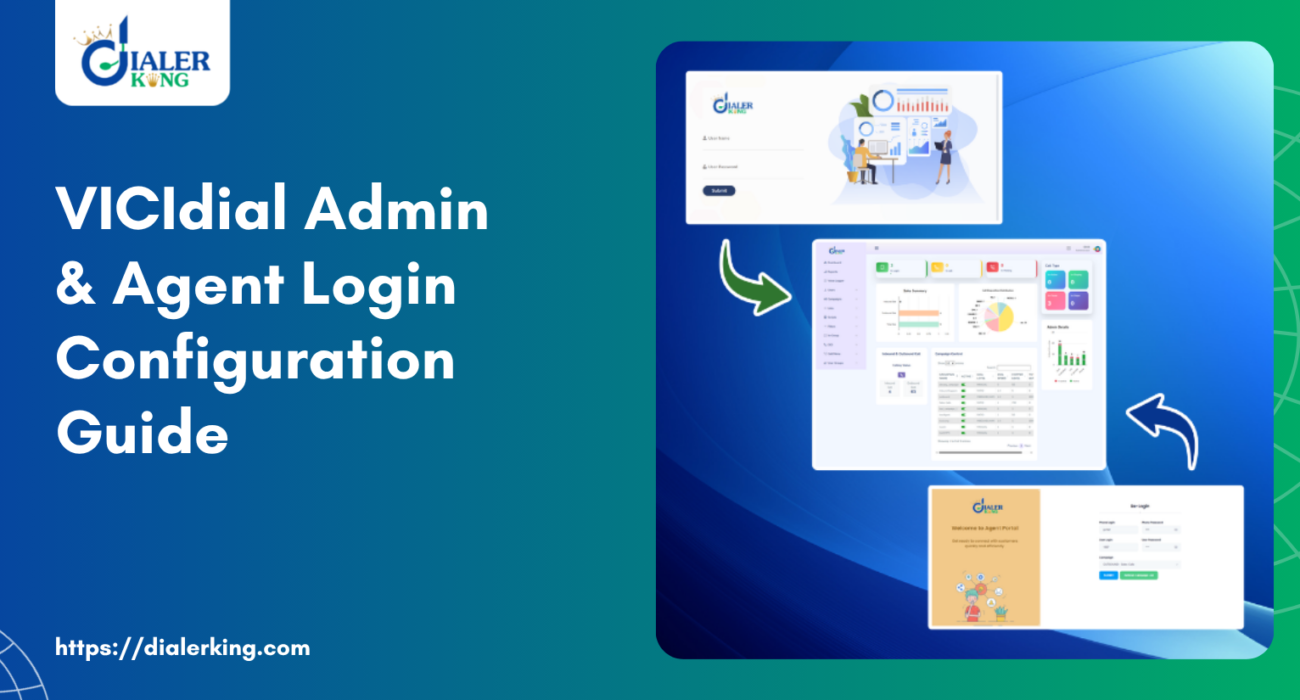
- Understanding VICIdial Access Architecture
- Admin Panel Login: Default Credentials & First-Time Setup
- Agent Interface Access & Login URL Structure
- VICIdial User Levels Explained
- Configuring User Groups & Permission Scopes
- Restricting Report Access: Step-by-Step Permission Guide
- VICIdial Non-Agent API: Integration & Automation
- Deploying a Custom VICIdial Dashboard
- Fixing Common Login & Database Connection Issues
- Call Transfer Configuration: Blind vs. Attended
- Frequently Asked Questions
- Conclusion
VICIdial login configuration is the foundational process that determines who can access your contact center platform, what they can see, and what actions they are permitted to perform. Whether you are provisioning a fresh Vicidial deployment or restructuring permissions on an existing multi-campaign environment, getting this layer right prevents operational bottlenecks, data exposure, and agent downtime.
This guide covers the complete setup process – from admin panel access and agent interface provisioning to user-level permission architecture, Non-Agent API integration, and deploying a modern custom dashboard on top of your VICIdial installation.
Whether you manage a five-seat outbound team or a 300-seat blended contact center running predictive dialing across multiple campaigns, the principles in this guide apply uniformly. Each section is structured so IT administrators can implement configurations directly, while operations managers have enough context to oversee deployments without needing to read server logs.
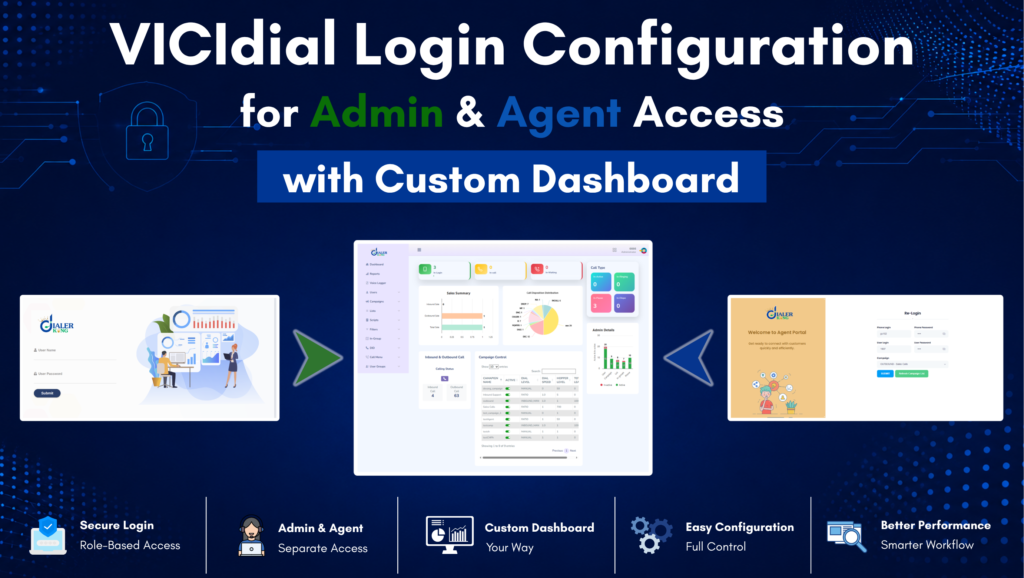
Understanding VICIdial Access Architecture
VICIdial operates on a layered access model. At the top sits the administrator interface, followed by supervisor views, and finally individual agent sessions. Each layer has its own login URL, credential set, and permission scope. Mixing these up – for example, giving an agent a user level that exposes campaign settings – is one of the most common configuration mistakes in new deployments.
The system authenticates users against its internal MariaDB/MySQL database. When a user submits credentials, VICIdial validates the username, password hash, active status, and user level before determining which interface elements and menu items to render. This means access control is not just a frontend concern – it is enforced at the database query level.
There are three primary access points in any standard VICIdial deployment:
- Admin Panel – full system management, campaign configuration, carrier setup
- Supervisor/Manager View – real-time monitoring, agent management, reporting
- Agent Interface – call handling, lead disposition, script display
Custom deployments may relocate these endpoints. For instance, DialerKing’s custom theme installations typically serve the admin panel at /dialer/admin.php rather than the default /vicidial/admin.php, while agent interfaces may be served from /agent/agent.php or a custom path depending on the theme configuration.
Admin Panel Login: Default Credentials & First-Time Setup
On a standard VICIdial installation, the administrator dashboard is accessible at:
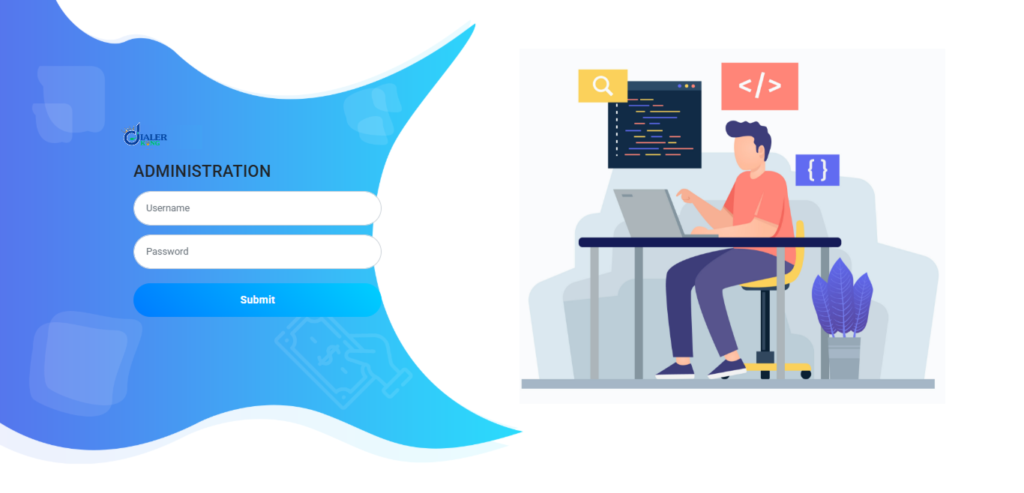
http://[YOUR_SERVER_IP]/vicidial/admin.php First-Time Admin Setup Checklist
- Log in at /vicidial/admin.php with default credentials
- Navigate to Admin – Users and change the default admin password
- Verify your server’s timezone setting under Admin – System Settings
- Confirm SIP trunk and carrier configurations before creating campaigns
- Set up User Groups before provisioning individual agent or supervisor accounts
Agent Interface Access & Login URL Structure
Agents access VICIdial through a separate URL from the admin panel. The standard agent login page is located at:

http://[YOUR_SERVER_IP]/vicidial/vicidial.php On custom theme deployments, this path may differ. DialerKing’s custom installations, for example, commonly serve the agent interface at /agent/agent.php or a client-specified path. The underlying authentication mechanism remains identical – only the file path changes.
When an agent logs in, they must provide:
- Username and password assigned by the administrator
- Phone extension or SIP softphone details for audio routing
- Campaign selection (if not pre-assigned at the user level)
Agent Login on Mobile & App Environments
For teams running remote agents on Android devices or mobile-optimized interfaces, VICIdial’s web-based agent interface is accessible through any modern mobile browser. WebRTC-enabled custom deployments extend this further by routing audio directly through the browser without requiring a separate softphone application.
Administrators configure the WebRTC gateway endpoint in the Admin – Phones section, and agents access the same login URL from their mobile device.
A practical example: a mortgage lead generation company operating 40 remote agents across three time zones deployed DialerKing’s custom VICIdial theme with WebRTC audio.
Agents log in through a mobile-optimized browser interface, the system routes audio through SIP over WebSocket, and supervisors monitor all 40 sessions in real time from the custom dashboard – no hardware phones, no per-device client installation.
VICIdial User Levels Explained
User levels in VICIdial are numbered 1 through 10 and determine the ceiling of what a user can access. They function like a permission tier system – a user cannot exceed the access defined by their level regardless of other settings.
User levels work in tandem with the individual permission flags set on each user record. A Level 8 user can be further restricted by setting specific permission flags to 0, effectively creating custom permission profiles without modifying the underlying user level structure.
Configuring User Groups & Permission Scopes
User Groups in VICIdial are templates that define permission scopes, reporting visibility, and interface access for collections of users. Assigning a user to a group is significantly more efficient than configuring permissions manually on each account – particularly in contact centers with large, structured teams.
To create a User Group, navigate to Admin – User Groups – Add User Group. Key configuration fields include:
- Group Name – an internal identifier such as AGENTS_OUTBOUND or SUPERVISORS_INBOUND
- Allowed Reports – controls which reports members of this group can view
- Allowed User Groups – determines whose activity data this group can see in reports
- Admin Interface Options – a matrix of individual permission flags
User Groups are particularly powerful for multi-client or multi-department contact centers. A BPO running campaigns for three different clients can create separate User Groups per client, ensuring supervisors for Client A cannot see campaigns, leads, or reports belonging to Client B.
Restricting Report Access: Step-by-Step Permission Guide
One of the most common operational requirements is giving a team lead or external auditor access to specific reports without exposing admin functions. VICIdial handles this through a combination of user level assignment, User Group configuration, and individual permission flags.
Step 1 – Create a Dedicated User Group
Navigate to Admin – User Groups and create a new group. Name it something descriptive like REPORT_ONLY_USERS.
Step 2 – Configure Allowed Reports
Within the User Group settings, scroll to the Allowed Reports section. Select only the reports this group should access – for example, Agent Time Detail Report. Deselect all others.
Step 3 – Provision the User Account
Create the user account under Admin – Users – Add User with the following settings:
- User Level: 7 or 8
- User Group: REPORT_ONLY_USERS
- Active: Y
- View Reports: 1
- Modify Campaigns, Modify Users, Load Leads, Delete Users: all set to 0
Step 4 – Verify Access
Log in with the newly created account and confirm that the menu displays only the permitted report. All admin modification options should be absent from the navigation.
This configuration is particularly useful for compliance teams, external QA auditors, or client-facing reporting accounts where data visibility must be controlled without creating full administrative access.
VICIdial Non-Agent API: Integration & Automation
The VICIdial Non-Agent API is a backend HTTP interface that enables external systems to interact with the VICIdial platform without requiring an active agent session. While the Agent API manages real-time actions inside a live agent screen, the Non-Agent API operates at the system level – handling data operations, campaign management, and automation workflows programmatically.
The Non-Agent API endpoint on any standard installation is:
http://[YOUR_SERVER_IP]/vicidial/non_agent_api.phpAPI Comparison: Agent API vs. Non-Agent API
| API Type | Endpoint | Primary Use Case |
|---|---|---|
| Agent API | /agc/api.php | Live session control – pause, transfer, disposition, hang-up. |
| Non-Agent API | /vicidial/non_agent_api.php | System-level automation, CRM synchronization, lead injection, and reporting. |
Common Non-Agent API Use Cases
- Lead Injection: External CRM systems push new prospects directly into a VICIdial list via API, eliminating manual CSV uploads and reducing lead-to-dial latency
- Real-Time List Management: Update or remove individual lead records based on CRM dispositions without administrator intervention
- Campaign Statistics Pull: Reporting dashboards query campaign metrics in real time through API calls rather than requiring a database-level connection
- Callback Scheduling: External scheduling tools inject high-priority callbacks directly into the dialer hopper with specific dial timestamps
- Dynamic User Provisioning: Bulk user creation scripts leverage the API to onboard large agent cohorts without manual admin panel work
A lead generation company using a custom GoHighLevel-to-VICIdial integration relies on the Non-Agent API to push web form submissions into the active dialer hopper within seconds of a prospect submitting their details. The agent receives the call within moments of the prospect’s interest peak – a configuration that directly improves contact rates compared to batch CSV uploads.
Deploying a Custom VICIdial Dashboard
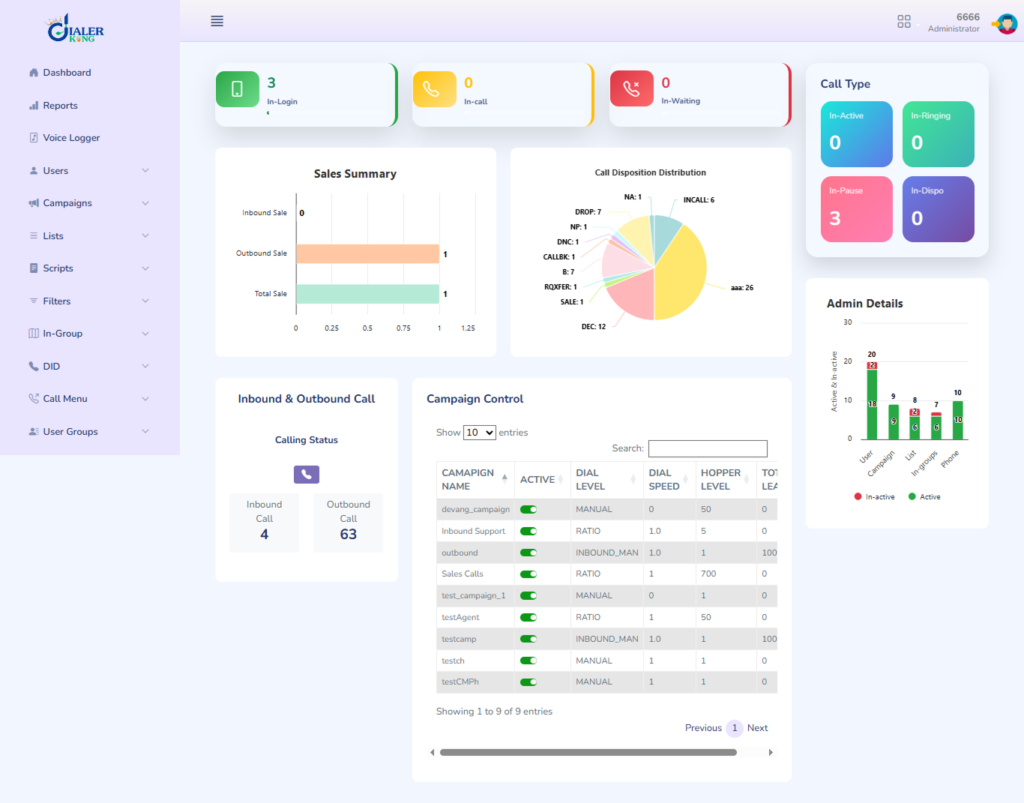
The standard VICIdial administrative interface is functional but visually dated. For contact center operators who need a modern management experience – particularly at the supervisor and executive level – a custom dashboard layer built on top of VICIdial’s core platform delivers substantially better usability without sacrificing any native functionality.
DialerKing develops custom VICIdial themes using React-based frontends with Tailwind CSS, served from custom file paths on the same server as the core VICIdial installation. The approach preserves all backend logic, database operations, and API integrations while replacing the rendered interface.
What a Custom Dashboard Typically Includes
- Real-time agent status grid with color-coded availability and talk states
- Campaign performance panels with live dial ratios and drop rate monitoring
- Lead penetration visualization by list and campaign
- Supervisor call monitoring controls with barge and whisper functionality
- Inbound queue depth displays for ACD-managed queues
- Custom disposition summary widgets configurable per campaign
Accessing a Custom Admin Panel
On custom theme installations, the admin panel URL structure changes. A typical DialerKing deployment serves the admin interface at a path like:
https://[YOUR_DOMAIN]/dialer/admin.php Theme selection, layout configuration, and color scheme customization are handled at the deployment stage based on client specifications. After login, the interface renders the same campaign, user, and system management options as the standard VICIdial admin panel – just in a significantly more navigable format.
Theme Development Requirements
- ViciBox version of the existing installation
- SVN (VICIdial codebase) version
- AlmaLinux server with a dedicated IP (provided by the client)
- Server access for installation and configuration, or source code delivery with installation documentation
Fixing Common Login & Database Connection Issues
VICIdial login failures generally fall into two categories: credential errors and database connectivity issues. When an agent or administrator cannot log in and the credentials are confirmed correct, the next diagnostic step is always the database layer.
Diagnosing a MySQL/MariaDB Connection Failure
- SSH into your server and check the database service status: systemctl status mariadb
- If the service shows as stopped or failed, start it: systemctl start mariadb
- Verify that the VICIdial database credentials in the configuration files match the active MySQL user credentials.
- Check available disk space – MariaDB will refuse to start on servers with critically low disk capacity.
- Review
/var/log/mariadb/mariadb.logfor specific error messages before attempting a restart.
Other Common Login Issues:
- Agent cannot log in: Verify the user account is set to Active: Y and the user level is appropriate for the agent interface
- Admin panel shows blank: Typically a PHP-MySQL connectivity issue – check web server error logs
- Session timeout loops: Review the VICIdial session management settings in the system configuration table
- Wrong interface after login: User level mismatch – a Level 1 user pointed to the admin URL will not authenticate correctly
Call Transfer Configuration: Blind vs. Attended
Call transfer configuration in VICIdial is set at both the campaign level and the individual agent interface level. Understanding the distinction between transfer types is essential for supervisors configuring agent workflows.
Both transfer types are accessible from the agent interface transfer panel during an active call. Supervisors configure which transfer options appear in the agent interface at the campaign level under the Local Call Transfer settings.
Frequently Asked Questions
What are the standard credentials for VICIdial agent access❓
Agent accounts do not have universal default credentials. Each agent account is created individually by an administrator under Admin – Users, with a username, password, and user level assigned at that time. Agents then log in through the agent interface URL using their assigned credentials. The admin is responsible for distributing these and enforcing password policies.
How do you set up IVR routing in VICIdial❓
IVR configuration in VICIdial is handled through the Admin – Phone Numbers and Admin – In-Group sections. You create an IVR plan by defining DTMF digit responses that route callers to specific in-groups, campaigns, or extensions. Multi-level IVR trees are built by chaining in-group routing rules. For dynamic IVR behavior – such as database-driven menu options – AGI scripting integrated with Asterisk dialplans extends the native VICIdial IVR capability.
How do you change the server IP address in VICIdial❓
Changing the server IP in VICIdial requires updates in multiple locations: the VICIdial database (specifically the servers table), the Asterisk SIP and extension configuration files, and any hardcoded references in the VICIdial configuration files. After updating the IP, restart both the Asterisk and web services. If you are using a high-availability cluster setup with Keepalived, the virtual IP configuration will also need to be updated. Always take a full database backup before making IP changes in production.
Can VICIdial run on Android or mobile apps❓
VICIdial does not have a native Android application, but the agent interface is fully functional in any modern mobile browser, making it effectively mobile-accessible. For deployments requiring true mobile agent support, WebRTC-enabled custom themes route audio through the browser, eliminating the need for a separate softphone. Administrators configure the WebRTC endpoint in the system settings, and agents access the same login URL from their device.
Conclusion
Effective VICIdial login configuration is not a one-time setup task – it is an ongoing operational discipline. The access architecture you establish on day one determines how securely and efficiently your platform scales as your team grows, campaigns multiply, and integrations deepen. Getting user levels, User Groups, and permission flags right from the start prevents the messy retroactive corrections that disrupt live operations.
The key areas covered in this guide – admin and agent access setup, permission-based report restrictions, Non-Agent API integration, custom dashboard deployment, and database connectivity troubleshooting – represent the full configuration lifecycle most contact center operators encounter. Each section provides directly actionable steps rather than conceptual overviews.
If your contact center is planning a VICIdial deployment, migrating to a custom dashboard interface, or needs help structuring a permission architecture for a complex multi-team environment, the DialerKing team brings hands-on deployment experience across diverse operational contexts. From single-server installations to multi-node clustered environments with custom CRM integrations, we configure and support VICIdial the right way from the ground up.
Contact us today to discuss your VICIdial login configuration requirements, request a live demo of our custom dashboard themes, or get a scoped proposal for your specific deployment environment.